

When it comes to painting work, there are two schools of thought: those who hire a painter and those who choose to do it themselves.
Painting a wall isn't that complicated, but it does require a few steps to achieve the best possible results. Many legitimate questions arise, including this one: how to paint or repaint a wall?
To help you get the best possible guidance on your project, the Algo team is here to give you all the professional advice you need to paint your walls like a pro!
Choose the right paint for your walls
Today there are a plethora of paints available to paint your interior walls: interior, exterior, ceiling, wall surfaces, ecological, acrylic, glycerine, satin, velvet, matte, etc.
Choose an eco-friendly paint for your walls
The choice can be complicated, but in reality, you should know that interior paints all have the same promise: that of allowing you to paint your walls.
Initially, choosing an ecological paint remains the best possible solution: responding in every way to the use of a classic paint, ecological paints guarantee a performance equivalent to classic paints and a similar application process.
Not necessarily more expensive than a so-called “classic” paint, its use will allow the VOC rate to be considerably reduced compared to a standard paint.
For greater transparency, choose paint certified by a label ensuring a certain reliability.
Beyond the recommendation related to ecological paint, choose a paint compatible with application to wall surfaces and on the support of your wall if it is made of a specific material (concrete, cement, etc.)
Which finish should I choose?
If the choice of finish for ceilings is mainly matte (in particular to guarantee the reduction of roller marks), you have the possibility of applying all possible finishes, namely matte, satin and velvet.
The mast:
The matte finish will be perfect on supports that have imperfections (holes and imperfections) because it is a finish that tends to hide any imperfections.
Satin:
This is the finish you need if washability is essential to you: brighter, it is a slightly shinier finish guaranteeing a more polished appearance than matte.
Velvet:
It's an intermediate finish, halfway between matte and satin. Velvet has the advantage of not having that sometimes dreaded shiny finish, nor is it a finish with less washability.
Estimate the amount of paint needed for your walls
There is nothing more unpleasant than running out of paint in the middle of a construction site, or on the contrary having much more than expected.
Planning the right amount of paint is not impossible if the right criteria are taken into account, namely: the total surface area you wish to paint as well as the yield indicated by the manufacturer.
To obtain a measurement that is as accurate as possible for your needs, calculate the wall surface to be painted in each room, including the height and width of the walls.
Once you have taken the measurements, take into account the coverage of the paint you are going to use and apply this simple formula to obtain the quantity needed to paint your walls: wall surface ÷ coverage estimated by the manufacturer = number of liters needed for one coat.
This formula applies to both the undercoat and the paint, except that for the topcoat, the number of liters must be multiplied by two if two coats of paint are to be applied.
If you want to get the most accurate measurement possible, you can check out our area calculator .
What equipment do I need to paint a wall?
To paint your walls correctly, you will need the following materials:
- a flat paint tray to spread the paint evenly on the roller
- a roller with a mount. When using Algo paints, a 14 mm roller is recommended for the best possible adhesion.
- a sash brush to clear and paint the corners neatly
- masking tape, used to mark off and protect the surfaces to be painted and avoid overspreading.
Other optional tools may be useful, such as a rabbit's foot for resurfacing or tarps to protect furniture.
To help you, know that many retailers offer tool kits allowing you to have all the tools necessary to paint your walls.
Prepare the room and the walls to be painted
First of all, protect the floor and your furniture: this involves placing tarpaulins in the room and over the existing items.
Wall outlets are also important to protect, so you can surround them with smooth masking to make sure you don't paint over the switches.
Likewise, baseboards and woodwork should also be covered to ensure that no paint gets on them.
Next, we strongly recommend inspecting the walls that will receive the paint in order to identify any possible traces of imperfections: holes or cracks in particular.
Start by cleaning your wall with a microfiber cloth lightly dampened with soapy water.
Then rinse your wall thoroughly with clean water and let it dry for a few hours.
Once the wall is dry, you can then coat the irregularities in your wall to fill the holes.
Once this work is done, you can smooth it out by sanding or roughening your surface with fine abrasive paper and then cleaning the wall again to remove the dust.
The paint must also be prepared
Before applying the paint, open your pot and mix it for several seconds to make the paint perfectly homogeneous.
Some paints cannot be diluted, but some manufacturers recommend it: for example, with Algo paints, you can dilute the paint with water up to 5%, compared to 10% for spray application.
Application can be done in two ways: spray or roller. When applying with a spray, assume that there may be a yield loss of up to 20%.
For more information on this topic, you can check out our article dedicated to spray painting .
It is then advisable to plan for a little more paint than expected.
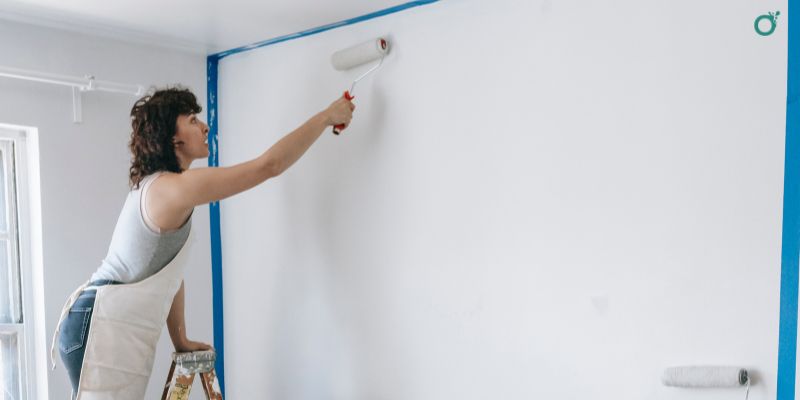
Applying the paint
This is one of the most exciting stages of a painting project: application.
Paint in ideal conditions: in a room without humidity with a temperature between 12° and 25°.
You can start by applying a base coat, also called a “primer,” to promote adhesion of the finishing paint and thus reduce paint consumption.
The undercoat also provides aesthetic guarantees since its application allows the finishing color to be better revealed.
The primer is applied in the same way as the finishing paint, except that only one coat is needed. This will help even out the wall and also ensure better adhesion of the finish.
Sash edging is one of the preliminary steps for clearing corners and painting hard-to-reach areas. We mentioned this step in the list of tools needed to paint your walls: the sash brush or rabbit's foot are primarily used for this.
Surfaces must be clean, sound, and dry before application. Paint in 1m² areas to avoid possible roller marks.
To limit marks, do not hesitate to pass your roller over the painted part of the wall without reloading it in order to distribute any excess paint over the surface.
Cross the layers by applying first from top to bottom, then from left to right without pressing too hard on the roller to avoid drips.
3 coats of paint are required to achieve the best possible finish (one coat of primer and two coats of finish). Drying time is important: wait 12 hours between each coat to promote thorough drying.
To finish your work as quickly as possible: don't hesitate to start painting at the beginning of the day to be sure of being able to apply at least two coats during the day.
Depending on the color of the shade used, 3 finishing coats may be recommended, especially on bright shades.
The work is not quite finished
Once the paint is applied to the walls, remove the smooth masking tape before the paint dries. This prevents the paint from cracking, which can happen if the masking tape is removed after it has dried.
When it comes to cleaning tools, the advantage of using eco-friendly paint is that it can be done with hot water without any problems.
On the other hand, to save you time, you can put your rollers and brushes in a plastic bag between two coats of paint of the same color.
The paint will not dry.
If your paint pot is not empty, the ideal is to close it well and place it in a dry place between 12° and 25°.
Your empty pots will be taken to the recycling center.